Tips on Advanced Stream Habitat Survey (Module 2)Click on to images below to see larger size.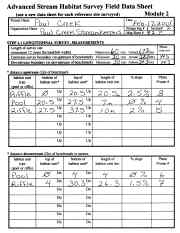 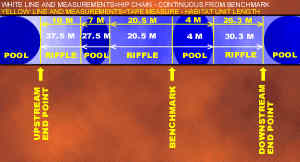
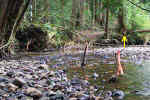
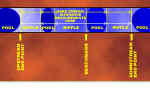
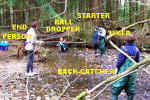
This diagram and sample data sheet show how to collect data and then record it on the sheet. Once you have established your benchmark, take the cross-sectional measurements (bankfull and wetted). Using the hip chain to measure distance, walk downstream six times the bankfull channel width. Continue to the end of the habitat unit you end up in, and place a flag there. Break off the hip chain thread, and start walking back upstream to the benchmark, collecting the hip chain thread as you go. As you walk back upstream, mark the boundaries of each of the alternating pool and riffle habitats with flagging tape. Upon returning to the benchmark, tie off and zero the hip chain and walk upstream to a distance of six times the bankfull channel width measurement. Once you have travelled this minimum distance, continue upstream until you come to the end of the habitat unit you are currently in, and place a flag there. Return to the benchmark, placing flags at the start of each habitat unit, and collecting hip chain thread, as you go.
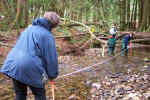
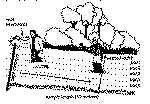
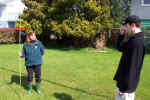
Tie off and zero the hip chain at the benchmark and mark on your data form (Module 2 page 24) which type of habitat unit you are in, and that the bottom is zero meters from the benchmark. Using the hip chain and a fibre glass tape measure, start walking upstream to the top of the habitat unit. Mark down the measurement from the hip chain as top of habitat unit, and the measurement from the tape measure, as length of habitat unit. The top of this habitat unit is the bottom of the next. Mark down the new habitat unit and transfer the measurements to the Module 2 page 24 data sheet. As you move upstream, take the % slope measurement for each habitat unit as outlined in Module 2 page 14 of the Streamkeepers handbook and Modules. TIP: The hip chain measurement is a continuous measurement. It measures the distance from the benchmark to the top and bottom of each habitat unit. The fibreglass tape is used to measure the length of each habitat unit individually. Keep the tape and the hip chain tight to get a true measurement. Click here for clinometer tips.
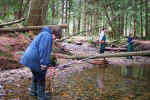
Return to the benchmark, picking up hip chain thread and flagging tape along the way. Count large woody debris (LWD), rooted cut-banks, watch for off-channel habitat, bank erosion and stabilization, length of bank with no vegetation on Module 2 page 25 data sheet. To collect downstream boundary data, tie off and zero the hip chain at the benchmark, and record the type of habitat unit (Module 2 Page 24). Record that the top of the habitat unit is 0 meters from the benchmark. Walk to the end (downstream) of the habitat unit, record the bottom of habitat unit measurement. Again, use the hip chain to record distance of each habitat unit from the benchmark, and use the fibreglass tape measure to record the length of each habitat unit. Also, record % slope for each habitat unit. Continue measuring to the bottom of the last habitat unit within your reference site. You now know the actual number of meters to your downstream survey boundary from your benchmark. Record this on the data sheet. Return to the benchmark, picking up hip chain thread and flagging tape along the way. Count large woody debris (LWD), rooted cut-banks, watch for off-channel habitat, bank erosion and stabilization, length of bank with no vegetation on Module 2 page 25 data sheet.
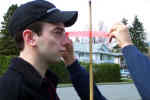
Clinometer Tips:
March 30, 2001 | ||||||||||||||||||